Crochet has always been a comforting escape for me—a space where creativity meets the meditative rhythm of working with yarn. From intricate lace patterns to charming amigurumi, I’ve explored a world of textures and shapes, each stitch carrying a bit of my personality. Over the years, I’ve learned that even the simplest projects can spark the greatest joy.
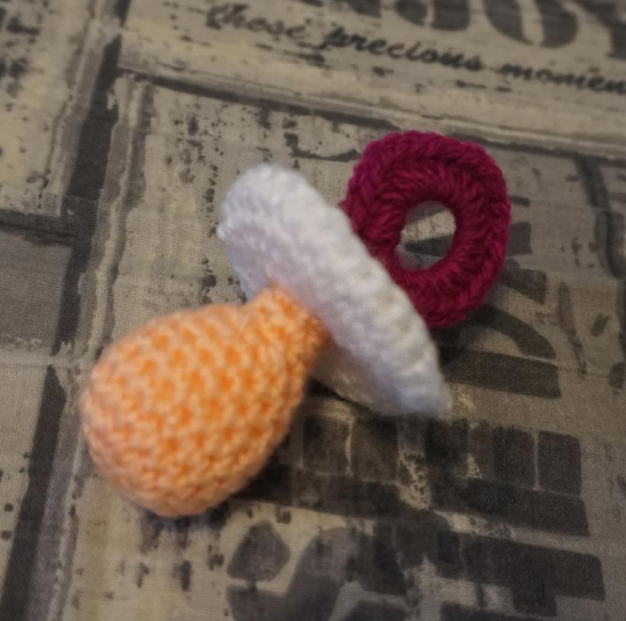
This crochet pacifier is one of those small but impactful creations. It’s more than a craft project; it’s a piece of art that’s both whimsical and meaningful. Whether you’re making it as a heartfelt gift, a decoration for a baby shower, or simply a way to refine your skills, this adorable pacifier is sure to brighten someone’s day—yours included!
A Little Pacifier with Big Impact
The crochet pacifier stands out as a delightful project because of its versatility and charm. Measuring approximately 4 inches, it’s the perfect size for various uses. You can attach it to a keychain, use it as a playful ornament, or add it to a baby-themed gift basket.
What makes this pattern even more special is its approachable complexity. It’s detailed enough to engage experienced crocheters but also straightforward for those newer to the craft. Plus, with room for customization—such as experimenting with different colors or yarn types—you can truly make this piece your own.
Tools and Materials You’ll Need
Before you begin, gather the following materials:
- Wool scraps in various colors: Suggested are skin tone for the teat, white for the circular part, and purple for the handle.
- Crochet hook: Size F (US) / 8 (UK) / 4.0mm (EU).
- Scissors: Sharp for precise cuts.
- Stitch marker: Essential for keeping track of rounds.
- Filler cotton: To give the teat its soft and rounded shape.
Getting Ready to Crochet
Preparation is key to enjoying your crochet experience. As with any craft, setting up your workspace with care makes the process more enjoyable and ensures better results. Here’s how to get started:
1. Prepare Your Materials
Lay out all your tools and materials within easy reach. This helps you avoid interruptions while crocheting and keeps the process smooth.
2. Practice the Magic Ring
This pattern begins with a magic ring, a foundational crochet technique for creating tight, round beginnings. If you’re unfamiliar with it, practice a few times on scrap yarn before starting the project.
3. Choose a Comfortable Space
Find a well-lit, cozy spot to work. Good lighting helps you see your stitches clearly, especially when working with small parts like the teat.
4. Set Your Mind to Relax
Crocheting is as much about mindfulness as it is about creativity. Take a deep breath, pick up your hook, and let the rhythm of your stitches guide you.
Step-by-Step Instructions
Below, you’ll find the step-by-step pattern for creating this adorable crochet pacifier. To view the full illustrated tutorial, click the link below the image.

Full Pattern: Click Here
Expert Tips for Crocheting Success
- Mastering Stitch Tension: Consistent stitch tension ensures that each piece of the pacifier fits together neatly. Take your time, especially if you’re new to working in rounds.
- Stuffing Pro Tips: Fill the teat lightly but evenly, ensuring it holds its shape without being overstuffed. This helps maintain the pacifier’s realistic and charming look.
- Finishing Touches: When sewing the parts together, use a yarn needle for clean seams. A careful assembly ensures that the pacifier looks polished and professional.
- Experiment with Colors: While the pattern suggests specific colors, don’t be afraid to explore! Bright, playful hues or soft pastel tones can add a unique touch to your finished piece.
A Closer Look at Key Techniques
Crafting the Teat
The teat is crocheted in rounds using a series of increases and decreases to shape it into a realistic form. This part showcases the beauty of amigurumi techniques. Using a skin-tone yarn adds a lifelike touch, but feel free to get creative with unconventional colors for a playful twist.
Perfecting the Circular Parts
The two circular pieces are simple yet elegant. When assembling, pay attention to alignment. Ensuring the circles are perfectly stacked before sewing helps achieve a professional and symmetrical finish.
The Handle: A Functional Accent
The handle isn’t just decorative—it gives the pacifier its distinctive look. Crocheting the handle in rounds ensures it’s sturdy and smooth, making it a delightful finishing touch to this project.
Wrapping Up: A Treasure to Cherish
Crocheting this pacifier is a journey of joy, patience, and creativity. Each stitch you make brings the design to life, turning simple yarn scraps into a cherished keepsake. Whether you’re gifting it, showcasing it, or simply enjoying the process of making, this small but meaningful project is sure to leave a lasting impression.
Let this project remind you of the beauty in creating something by hand—a tiny treasure that carries your time, effort, and love. Happy crocheting, and may this pattern inspire many more delightful creations!


