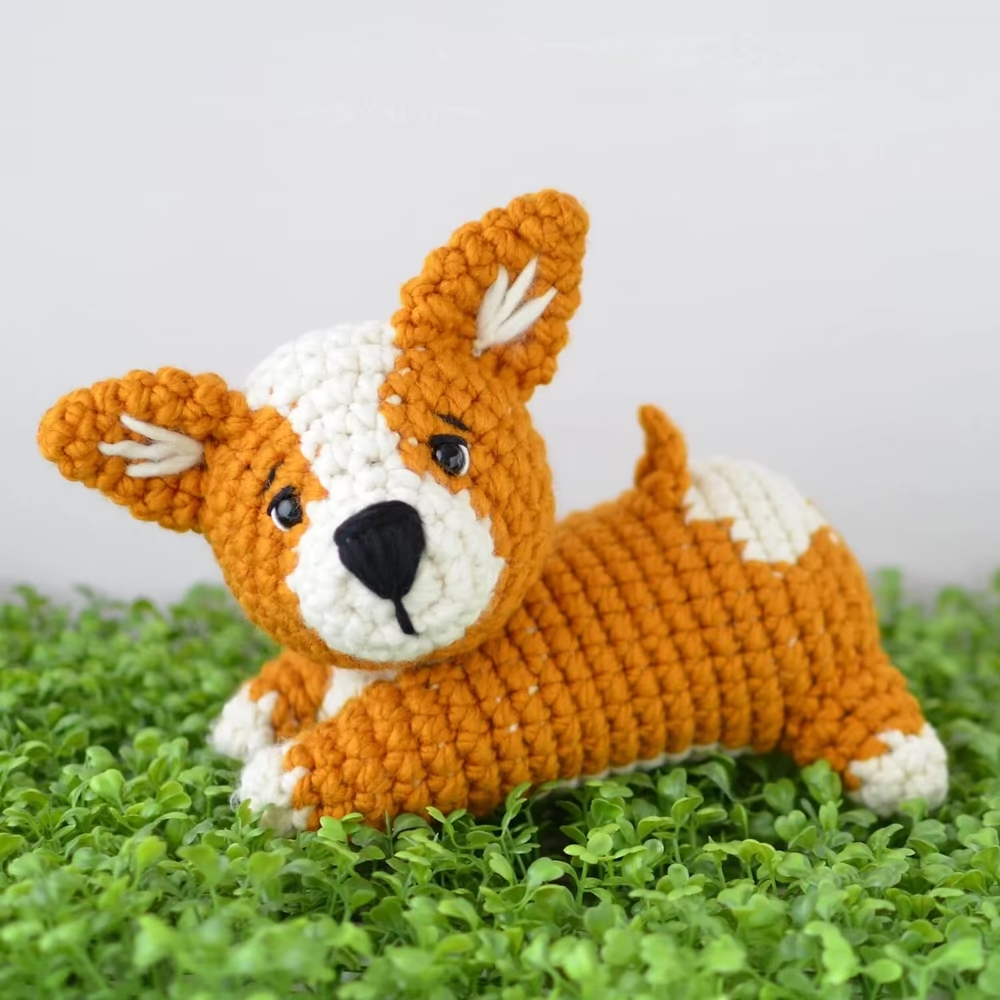
Crochet has always been a bridge between my love for crafting and my adoration for animals. The Baby Corgi project is a perfect blend of both, a celebration of the charm and joy these little pups bring into our lives. I recall seeing a fluffy corgi on a walk one day, and its happy trot inspired me to recreate that delight through yarn.
This project is designed with simplicity and love, making it accessible for crochet enthusiasts of all levels. The result is a sweet, huggable Corgi—perfect for gifting or displaying as a tribute to everyone’s favorite short-legged companion.
The Heart of the Pattern: Why This Baby Corgi Stands Out
The Baby Corgi crochet pattern is more than just a project; it’s an invitation to craft joy. With its small size and approachable techniques, this pattern delivers a rewarding experience without overwhelming complexity. Using Lion Brand Wool-Ease® Thick & Quick®, the final product feels plush and cozy, embodying the warmth and playfulness of a real corgi puppy.
This pattern’s clever construction of separate, easily joined pieces ensures a smooth assembly. The color changes for the classic Corgi markings add personality, while small embroidered details bring this pup to life.
Gathering Your Yarn and Tools
To crochet your own Baby Corgi, you’ll need:
- Lion Brand Wool-Ease® Thick & Quick®:
- Color A: Fisherman (1 ball)
- Color B: Butterscotch (1 ball)
- Crochet Hook: 7mm
- Fiberfill Stuffing: For plushness.
- Black Plastic Safety Eyes: 10mm diameter for that bright-eyed expression.
- Large-Eyed Blunt Needle: Essential for sewing and weaving ends.
- Embroidery Materials:
- Black yarn for the nose.
- Black and white embroidery floss for facial details.
Starting Off Right: Key Tips for Success
Before diving in, keep these tips in mind:
- Check Your Gauge: 10 single crochet stitches and 10 rounds should measure 4 inches. Adjust your hook size if needed.
- Master the Magic Ring: This technique ensures a clean, tight start for your rounds.
- Use Invisible Joins: These create seamless connections for a professional finish.
- Carry Yarn Neatly: When switching colors, carry the unused yarn along the wrong side to avoid tangles.
- Stuff as You Go: Gradual stuffing allows for even shaping.
Step-by-Step Instructions
The Baby Corgi comes together in seven sections: the body (with front legs), head, back legs, ears, and tail. Each section is crafted separately and then sewn together. Below is a sneak peek of the pattern. For full details, including all rounds and assembly instructions, click the link below:

Full Pattern: Click Here
Tips for Crafting a Perfect Corgi
- Facial Details Are Key: Take your time when embroidering the eyes, nose, and brows. These features give your Corgi its unique character.
- Ears That Perk Up: Stuff the ears lightly or leave them unstuffed for a natural floppy or perky look.
- Marking Placement: Ensure color changes for the Corgi’s markings are smooth and follow the instructions for an accurate finish.
- Seamless Assembly: Use the large-eyed blunt needle for sewing parts together securely, referencing the included images for guidance.
- Personalize It: Experiment with colors for a custom Corgi that matches your vision or mimics a real-life furry friend.
Wrapping Up: From Yarn to Wagging Tail
Creating this Baby Corgi is a journey of joy, a chance to bring a beloved breed to life with your hands. The finished piece is more than a crochet project—it’s a testament to patience, creativity, and the love for adorable companions.
Once complete, your Corgi is ready to charm its way into your heart or into the life of a lucky recipient. Keep crafting and spreading happiness—there’s always more magic to make, one stitch at a time.


