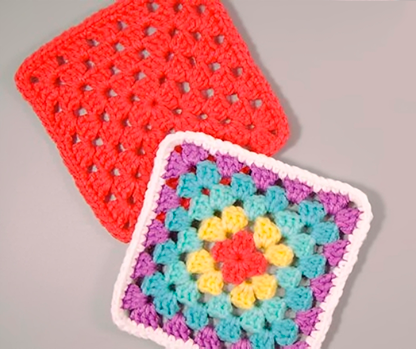
Ever since I picked up a crochet hook, I’ve found myself drawn to the timeless appeal of the granny square.
SEE A NEW PATTERN HERE
What started as a simple experiment has evolved into a beloved technique that I use in countless projects.
Over time, I’ve learned that granny squares are not only versatile but also deeply symbolic in the crochet world—a canvas for creativity that can be adapted in endless ways. This project, “How to Crochet the Perfect Granny Square,” encapsulates both tradition and innovation, with techniques that elevate the classic square into something truly special.
The Chainless Starting Double Crochet: A Game-Changer
If you’re like me, you’ve probably spent years working traditional double crochets (dc) without realizing there’s a more efficient way to start your rounds. Enter the Chainless Starting Double Crochet (CSDC). This clever stitch replaces the usual chain-3 start, eliminating that awkward gap that often forms at the beginning of each round.
The CSDC gives your granny squares a clean, cohesive look, and once you get the hang of it, you’ll never want to go back to chaining 3 again. It took me a few tries to perfect the technique, but now it’s second nature, and I’m thrilled to share it with you through this project.
Materials
To create your perfect granny square, you’ll need the following materials:
- Yarn: Any weight category can be used, so feel free to choose the yarn that best suits your project. The thickness of the yarn, the number of colors, and the desired size of your square will determine how much yarn is needed.
- Crochet Hook: Select a hook size that complements the thickness of your yarn. This ensures your stitches are consistent and even.
- Scissors: For trimming your yarn ends.
- Yarn Needle or Blunt Tapestry Needle: This will be used to weave in ends or join squares together.
Setting the Stage: Before You Begin
Before diving into this project, I recommend practicing the Chainless Starting Double Crochet (CSDC) if it’s new to you. This stitch is a bit different from the traditional double crochet, but it’s well worth the effort. The pattern also uses the Chainless Starting Single Crochet (CSSC), which is slightly simpler but equally effective. These stitches will give your granny squares a smoother look and eliminate the bulk that often comes with traditional starting chains.
Step-by-Step Instructions
Below is a snapshot of the instructions, but for the full pattern, click the link just beneath the image that will be posted shortly. It will take you directly to the detailed pattern where I walk you through each step, complete with photos and explanations to guide you along.
Full Pattern: Click Here
Additional Tips
- Mastering the CSDC: This stitch may feel awkward at first, but don’t give up! Practice by working a few rows of simple double crochet using the CSDC at the start of each row. Soon, it will feel just as natural as your regular stitches.
- Color Changes: For a striking design, experiment with changing colors at the start of each round. I find that using contrasting colors really makes the stitches pop and highlights the geometric beauty of the granny square.
- Blocking for Perfection: After finishing your square, consider blocking it to ensure crisp edges and even corners. Blocking can be as simple as wetting your square, shaping it to the desired dimensions, and letting it air dry flat.
Crocheting the perfect granny square isn’t just about mastering a pattern; it’s about embracing a technique that opens the door to countless creative possibilities. Whether you use your squares for blankets, garments, or even home décor, the skills you develop with this project will serve you for years to come. Every time I complete a new square, I’m reminded of how something so simple can be endlessly varied and beautiful.
As you embark on this project, take your time and enjoy the process. There’s something so satisfying about watching each square grow, stitch by stitch. And remember, the real joy of crochet comes not just in the finished product, but in the journey of creating it.


