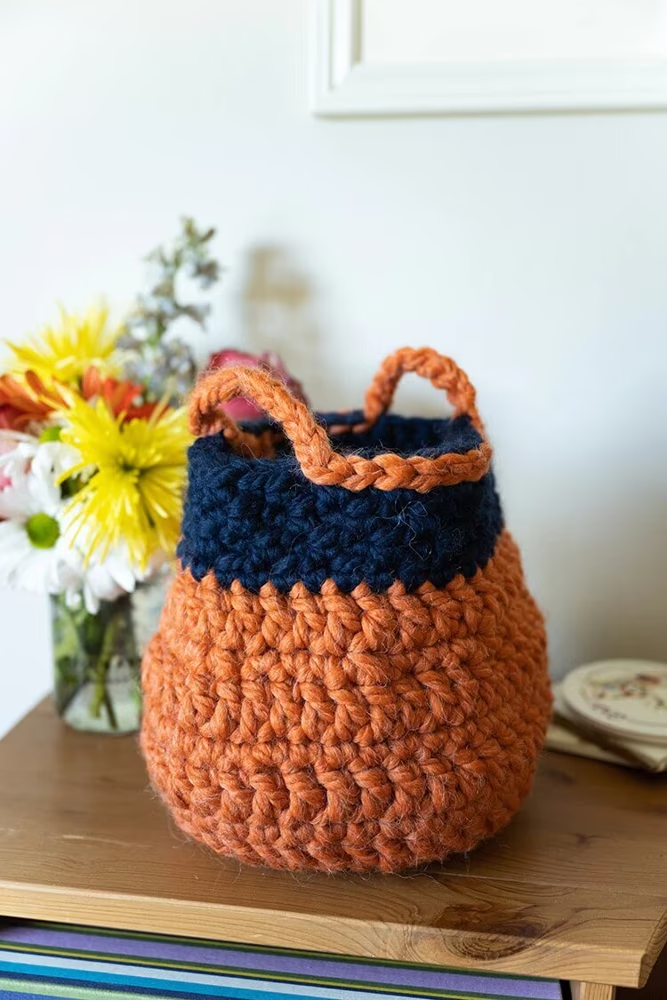
Crochet baskets are not only stylish but incredibly useful for keeping your space organized. The Maderia Basket, designed in collaboration with Kristi Simpson, combines modern aesthetics with practicality, making it perfect for storing anything from yarn to household items.
Made using Lion Brand’s Touch of Alpaca® Thick & Quick®, this project is designed for beginner to intermediate crocheters looking for a simple yet impactful piece to add to their collection.
In this tutorial, I’ll take you through the materials, steps, and finishing touches needed to create your own Maderia Basket. Whether you’re a seasoned crocheter or just beginning to explore larger, structured projects, this pattern is a great way to expand your skill set while crafting something beautiful and functional.
The Charm of the Maderia Basket
What sets this basket apart is its blend of practicality and rustic charm. The color combination of Pumpkin and Nightshade adds warmth and depth to the design, while the alternating rows of single and double crochet create a sturdy structure.
With easy-to-follow rounds and a straightforward construction, this project allows you to create a piece that is both decorative and durable.
Materials You Will Need
To create the Maderia Basket, gather the following materials:
- Yarn: Lion Brand Touch of Alpaca® Thick & Quick®
- 2 balls in color #132 Pumpkin (Color A)
- 1 ball in color #110 Nightshade (Color B)
- Crochet Hook: Size N (10 mm)
- Large-eyed blunt needle for weaving in ends
Gauge: 8 single crochets (sc) and 8 rounds should measure about 4″ / 10 cm. While exact gauge isn’t crucial for this project, working tightly will result in a sturdier basket.
Preparing to Start
Before diving in, familiarize yourself with the basic stitches used in this pattern: single crochet (sc), double crochet (dc), and slip stitch (sl st). The pattern also introduces techniques like working in the back loop only (sc-blo) to create a subtle textured effect. Make sure you’re comfortable with changing yarn colors, as this pattern calls for a color transition midway through the project.
Step-by-Step Instructions
The full pattern instructions for the Maderia Basket are available through the link below. Follow the pattern closely to achieve the correct shape and structure.

Full Pattern: Click Here
Tips for Crafting the Perfect Basket
- Work Tightly for Structure: Since this basket needs to hold its shape, maintaining a tight tension throughout is essential. Consider going down a hook size if your stitches are loose.
- Switching Colors Smoothly: When transitioning between Color A and Color B, make sure to fasten off the previous color neatly and weave in the ends securely to avoid bulkiness at the joins.
- Creating Uniform Handles: Pay attention to the chain count and skipped stitches when forming the basket handles. This will help keep both handles symmetrical and sturdy for carrying.
- Reinforce with a Finishing Block: After completing the basket, lightly block it to firm up the sides and smooth out the stitches. This will help your finished piece stand up on its own.
Adding Your Personal Touch
While the pattern uses a combination of Pumpkin and Nightshade for a warm and bold contrast, you can customize your Maderia Basket with other color combinations to suit your style or decor. Consider using two or three coordinating shades or even experimenting with a variegated yarn for a unique look.
Wrapping Up Your Maderia Basket
With your Maderia Basket complete, you’ve crafted a stylish and practical accessory that adds a touch of handmade charm to your home. Whether you use it to organize craft supplies, hold cozy blankets, or store toys, this basket is a testament to your skill and creativity. I hope you enjoy making and using this versatile project as much as I have.
Happy crocheting, and may your Maderia Basket hold all your treasures with style! 😊


